Darts
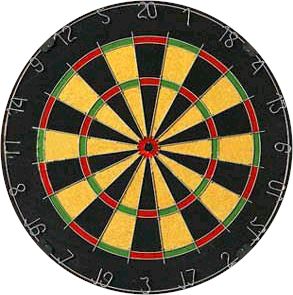
Over break I went out with a buddy of mine and played some darts. This got me to thinking, where exactly should someone aim in order to get the largest expected number of points? Now, obviously when you are playing a game like Cricket, where you should aim is fairly obvious, you are trying to hit particular numbers on the board, but in the most popular darts game -501, for most of the game you are just trying to accumulate points. So, where should you shoot on the board to get the most points? Well, something that I didn't quite realize before I started this adventure is that while the double bullseye in the center is worth 50 points, the triple 20 is worth more: 60 points. For the uninitiated, in games like 501 you score points based on where the dart falls. The center is the bullseye, where the inner most circle is worth 50 and the ring around it is worth 25, after that you score depending on which of the pie slice things you fall in, the points being the number on the slice. The little ring around the outside is worth double points, and the little ring at about half the board radius is worth triple points. So perhaps the triple 20 is where you should be aiming all the time. But you'll notice that to the left and right of the 20 section are low numbers 1 and 5. So you might suspect that if you can't throw all that accurately, you'll be paying a price for shooting at the triple 20.
The Model
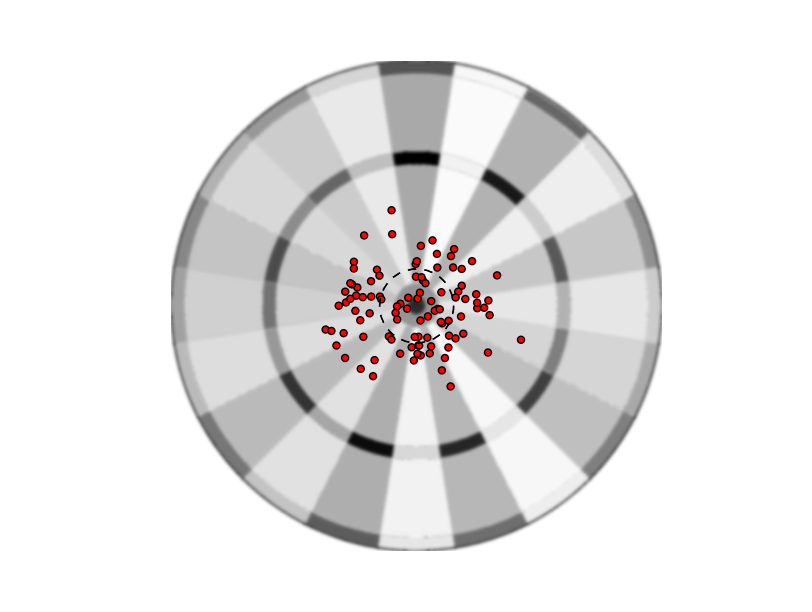
In order to answer a question like that, we need to develop a model for dart throwing. In this case, I thought it was safe to assume that dart throws are normally distributed about the place you aim, with some sigma determined by your skill level. To the left is an example of what normally-distributed dart throws look like when the aim is at the center, and with a 1 inch standard deviation in the throws. The dashed line marks a one inch ring to give a sense of how scattered darts can be from 1 standard deviation.
Results
So, off I went, having drawn a dart board (to regulation) in Gimp, and coloring each section in gray scale according to its point values, I used python to perform all of the necessary computations (using primarily the ndimage package in scipy). The result can be seen below.
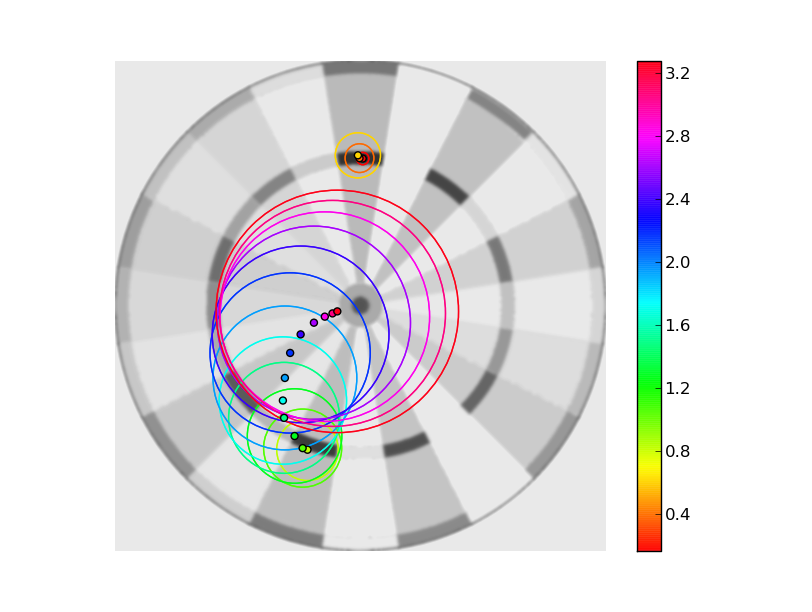
This image shows the optimal position on the board to aim for as a function of how good of a player you are. The rings denote the sigmas, and the dots the center point to aim for. The colorscale gives a quantitative measure of the sigma, in inches. As you can see, the best players should (and do according to youtube) aim for the triple 20, since they are good enough to hit it most of the time, but once you're throw is at about a 1 inch sigma, you should be aiming for the triple 19 in the bottom left. As you can see on the numbered board at the top, the triple 19 is buffered on either side by the 3 and the 7, which are both 2 points above the 20 section's neighbors (1 and 5). So as you might expect if you have a reasonable chance of hitting the sections to either side, the triple 19 offers a higher expected score in the long run. The other limit we can understand is the limit of really bad throws. If you have a nontrivial chance of missing the board altogether, then obviously you should just aim for the center of the board, in the hopes that you at least hit the thing. But interestingly, in between the track that the optimal aiming point takes is a little interesting. It tends to the center (as we should expect), but it takes a curvy sort of root along the bottom left quadrant of the board. Neat.
Heat Maps
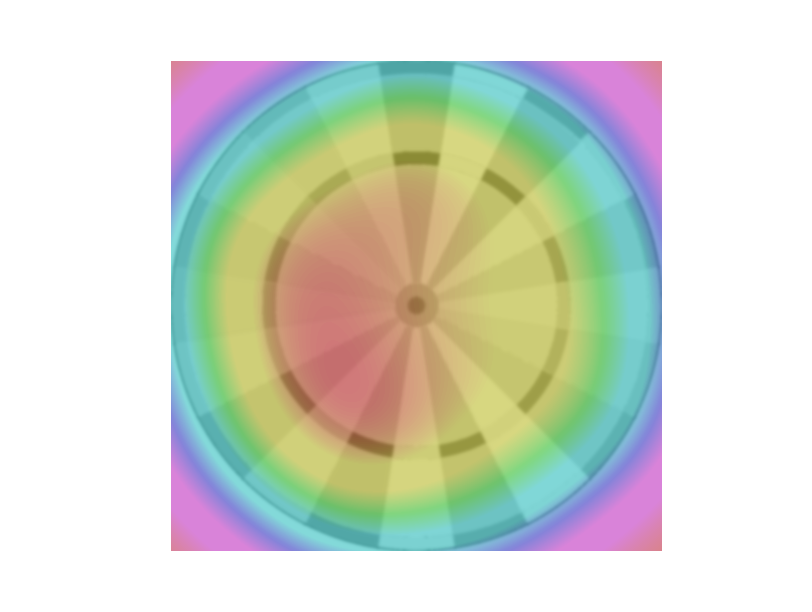
In order to get a little better of a feel for why the track takes the path it does, I decided to look at the heat maps for the expected score at every location on the board for a set of given sigmas. So, in the images below, the colors above the board indicate the relative score expected if you aimed at that point.
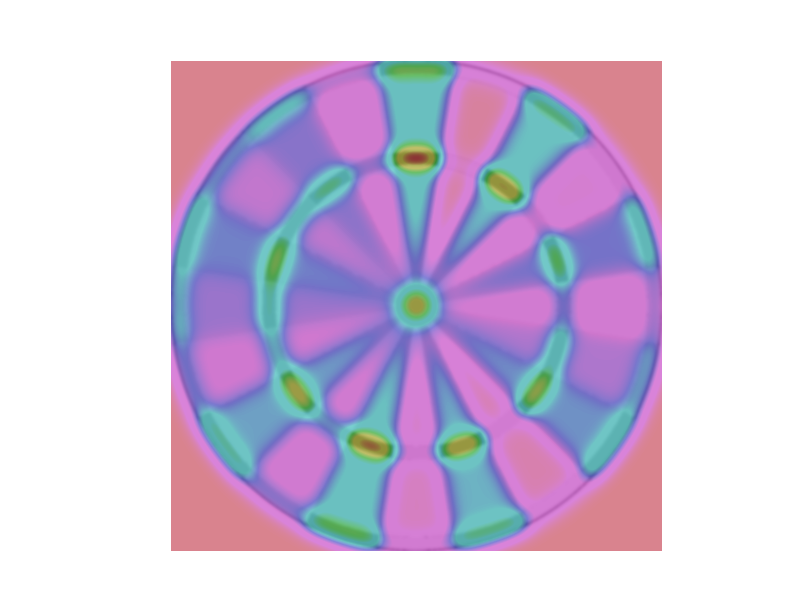
Above is for a quarter inch sigma throw [Click to zoom]. Notice that the triple 20 is the place to hit, as expected.

Above is a half inch sigma throw. The triple 20 is still in the lead, but not by a whole lot. You can really see how if your aim is as good as a half inch sigma, you can really still see the triple spots as true features.
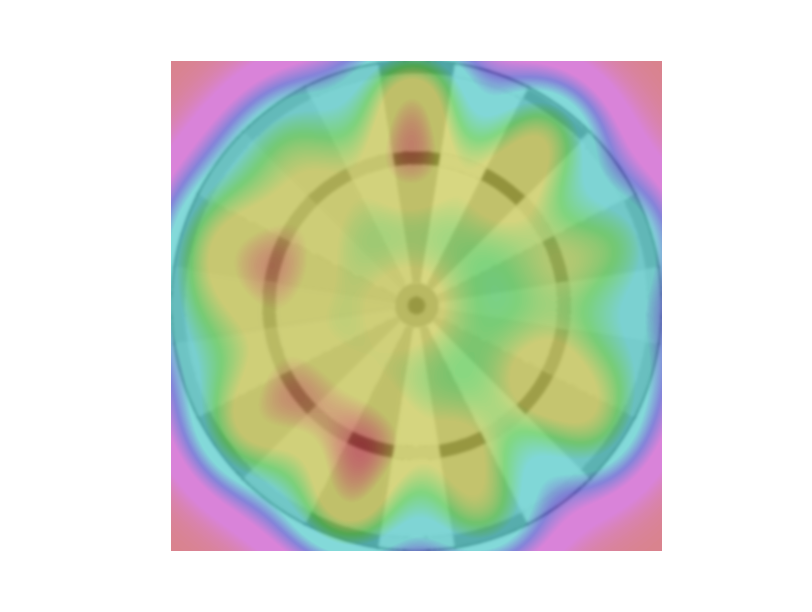
Above is a 1 inch sigma throw. Now the lower left hand quadrant has taken over as the optimal place to throw. Notice that both the triple 16 and triple 19 make decent targets. The triple 14 also makes a showing, due probably to its large neighbors.

Above is a 1.5" sigma. The triple 20 is nearly gone as a place of interest on the board, since we are no longer good enough to really capitalize on it. The lower left hand portion of the board is the place to be. We've really sort of lost any distinct features of the triple spots, and now are just looking at quadrants of the board as a whole. Our aim seems to tend to center a bit, as we are now in a little danger of falling off the board.
At 2" sigma, we can really only hope to aim left-of-center.

At 2.5" sigma, we really just want to hit the board.
Lesson
So, now I know, personally, I really just ought to aim just left of center.
Comments
Comments powered by Disqus